Want to create a high-converting booking system in 2026? Lunacal is a powerful scheduling tool that helps you turn simple booking links into sales-focused landing pages.
In this guide, you’ll learn how to install and set up Lunacal step-by-step and start getting more bookings and clients.
How to Install Lunacal (Step-by-Step) 2026
- Step 1: Create Lunacal Account
- Go to Lunacal official website
- Sign up using email or Google account
- Access your dashboard
- Step 2: Create Booking Page
- Click Create New Booking Page
- Add:
- Title
- Description
- Meeting type
- Step 3: Set Availability
- Choose your available days & time
- Set time duration (15, 30, 60 min)
- Enable time zone auto-detection
- Step 4: Connect Calendar
- Connect Google Calendar / Outlook
- Sync your schedule
- Avoid double booking
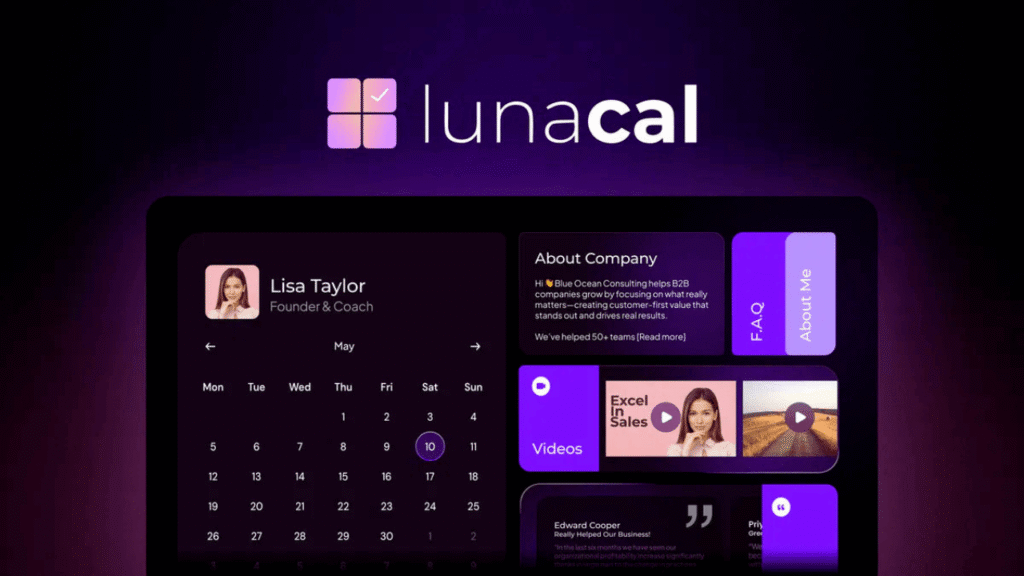
- Step 5: Customize Booking Page
-
Add:
- Profile image
- Intro video
- Testimonials
- Branding colors
- Make it look like a mini landing page
- Step 6: Add Payment (Optional)
- Connect Stripe or PayPal
- Set meeting price
- Enable paid bookings
- Step 7: Publish & Share
- Click Publish
- Copy your booking link
- Share on website, bio, or ads
Lunacal Key Features (2026)
- Conversion-focused booking pages
- Smart scheduling system
- Calendar integrations
- Payment collection support
- Email & SMS reminders
- Team scheduling
- Branding customization
- Mobile-friendly design
Pricing (2026)
- Lifetime deal (AppSumo)
- Starts around $59
- No monthly fees
Lunacal Review (2026)
- ✅ Pros
- High-converting booking pages
- Easy setup
- Supports payments
- Great for freelancers & agencies
- ❌ Cons
- New platform
- Needs customization for best results